Create Custom Template
You can create custom templates in two ways: create a new one via LayerPanel or import your own VM image file.
Creating from LayerStack Cloud Servers
Log in to LayerPanel, go to the Services section and click Cloud Servers button, and then select the cloud server of which you want to create a custom template.
Click on the Template button.
Enter your template name, then click Create button.
The template status will read In Progress on the Template List page. Once the template is created successfully, the status will read Working. You can also view the template name, region, and date in this section.
Importing a Custom VM Template
Log in to LayerPanel, go to the Services section and click Cloud Servers button, and then click on the Cloud Servers you want to use VM image file.
Click the Template button.
Click the Upload option and you will see three options here
File Location: Enter the HTTP download URL File Name: Enter your name of VM image file (E.g CentOS8) Example: http://xxx.com/pub/Linux/centos/8/xxx.iso
If your template file is stored in an FTP server, you need to use the FTP method and change the URL from http:// to ftp://.
Example:
http://ftp.xxx.hk/pub/Linux/centos/8/xxx.iso needs to be changed to ftp://ftp.xxx.hk/pub/Linux/centos/8/xxx.iso
File Location: Enter the FTP directory path File Name: Enter your name of VM image file (E.g CentOS8) FTP Login: Enter your FTP login username FTP Password: Enter your FTP password
Example: ftp://ftp.xxx.hk/pub/Linux/centos/8/xxx.iso
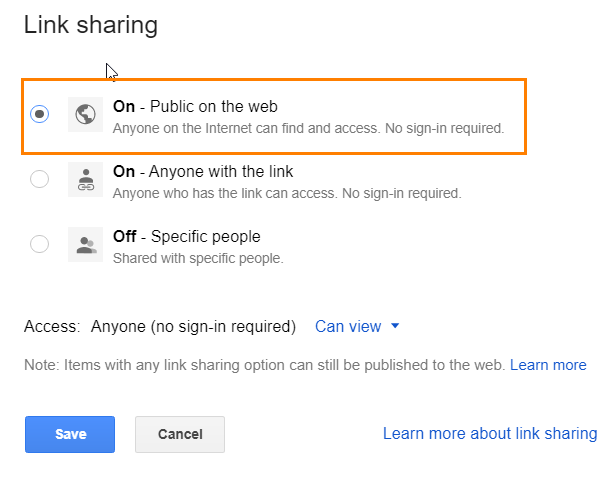
File Location: Enter the HTTP download URL File Name: Enter your name of VM image file (E.g CentOS8) Example: https://drive.google.com/file/xxx/view?usp=sharing
Make sure to select the Public on the web because the connection is public between your computer and our server.


4. Select File Format of your VM image file (E.g. vmdk, raw, vdi, vhdx and qcow2), and then click Upload to start uploading the file.
5. The template status will read In Progress on the Template List page. Once the template is created successfully, the status will read Working.
Last updated